
How to Skim Coat Walls After Wallpaper Removal (Fix Torn Paper the Right Way)
To skim coat walls after wallpaper removal, first wash off every trace of adhesive, cut away any loose or torn drywall paper, and seal the exposed brown paper with a penetrating sealer or an oil- or shellac-based primer. Only then do you apply thin skim coats, sand, and prime. Skip the sealing step and the water in your joint compound soaks into the torn paper and makes it bubble.
Wallpaper removal rarely goes cleanly, especially when the paper was hung on unprimed drywall. Here's how to get from a scarred, glue-streaked wall to a smooth, paint-ready surface, in the right order.
Why walls look so bad after wallpaper comes off
Drywall has a paper face over a gypsum core. When wallpaper is hung directly on unprimed drywall, the adhesive bonds into that face paper. Pulling the wallpaper off often takes the top layer of face paper with it, leaving fuzzy, torn patches of brown paper, and sometimes bare gypsum.
You'll usually be dealing with three problems at once:
- Adhesive residue: a thin, often invisible film of wallpaper paste that turns slick or tacky when wet
- Torn face paper: brown, fuzzy, absorbent patches where the top layer peeled away
- Gouges and dings: from scrapers, scoring tools and steamers
Each one needs to be handled before the skim coat, or it will show up later as cracking, peeling or bubbles.
Why torn drywall paper bubbles when you mud over it
This is the mistake that ruins the most walls. Torn brown paper is highly absorbent. When you put water-based joint compound (or a water-based primer) straight on it, the paper soaks up water, swells, and lifts away from the gypsum underneath. The result is blisters and bubbles that show up as the coat dries, sometimes hours later.
Sanding them off just exposes more torn paper, and the cycle repeats. The fix is to seal the paper first with something that soaks in and locks it down, so the next coat of water-based mud can't reach it. For more on bubbles from other causes, see our guide to skim coat bubbles and pinholes.
Tools you'll need
- Bucket, large sponges and rags for washing off adhesive
- Wallpaper adhesive remover (optional, for stubborn paste)
- Sharp utility knife with fresh blades, for trimming loose paper
- Penetrating sealer made for damaged drywall, or an oil-based or shellac-based primer
- Roller, 3/8" nap or less, and a brush for the sealer
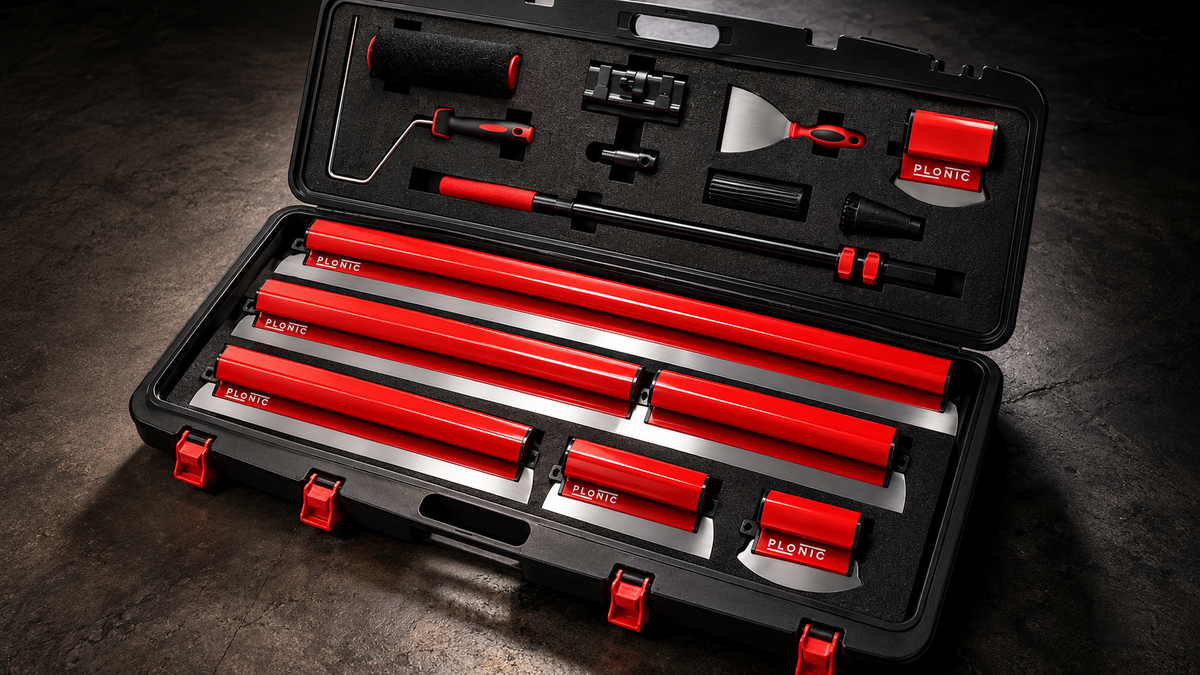
- Small knife (6" to 10") for filling gouges (the PLONIC 6-Piece Kit includes 6" and 10" blades plus a 7" putty knife)
- Wide skimming blade (24" to 32") for the skim coats
- Mud pan, drill and mixing paddle
- All-purpose or lightweight joint compound
- Sanding sponge or pole sander (150 to 220 grit) and a bright work light
- Primer for the finished skim coat, before paint
Step 1: Remove all the adhesive residue
Don't skip this step, even if the wall looks clean. Leftover wallpaper paste re-wets when water-based mud or paint hits it, which can cause the new coat to crack, wrinkle or peel.
- Wash the wall with warm water and a little mild detergent, working in small sections with a sponge.
- For stubborn areas, use a wallpaper adhesive remover and follow the label directions.
- Rinse with clean water and a fresh sponge, changing the water often so you're not just spreading diluted glue around.
- Let the wall dry fully.
How to tell it's gone: run your hand over the wall after a light dampening. If it feels slick, soapy or tacky, there's still paste on it. Wash again. Go easy with the water on areas where the face paper is torn, because soaking torn paper is exactly what you're trying to avoid.
Step 2: Cut away loose paper. Don't pull it.
Look for edges of torn face paper that are lifted, curled or loose. Trim them off with a sharp utility knife, cutting back to where the paper is firmly attached. Never pull or peel loose paper. It will keep tearing into good paper and make the damaged area bigger.
Lightly knock down any fuzz with a fine sanding sponge, then dust off the wall. You want a surface where everything left is tight to the wall.

The kit used in this guide
PLONIC 6-Piece Skimming Blade Kit
Six 0.5 mm stainless blades (6"–40") · telescopic pole · hard case · 6 spare inserts
★ 4.9 (36 reviews)
$129.99 · Free US shipping · 2-year warranty
Shop the 6-Piece Kit →Step 3: Seal the torn paper before any mud
This is the step that prevents bubbles. Coat every area of exposed brown paper (or the whole wall, which is easier and more uniform) with a sealer that soaks into the paper and hardens it.
You have two main options:
- A purpose-made penetrating sealer. Zinsser Gardz is a common example. It's a water-based problem-surface sealer that the manufacturer describes as penetrating and sealing damaged drywall face paper, and it also seals in residual wallpaper adhesive. It goes on milky and dries clear. Per the manufacturer's directions, it isn't thinned, it should be applied liberally so it soaks in, and it's typically ready for the next coat after about three hours (longer in cool conditions). Always follow the label on the product you buy.
- An oil-based or shellac-based primer. These have long been used to lock down torn drywall paper because they don't swell the paper fibers the way water does. Follow the label for ventilation and dry times.
Whichever you use, cover the torn areas completely. If you see a spot bubble after sealing, let it dry, cut the bubble out with a knife, and reseal that spot.
Step 4: Fill gouges and deep damage
Once the sealer is dry, fill scraper gouges, dents and deeper tears with a small knife. Keep these fills tight and level with the surrounding wall. Let them dry, and scrape off any ridges before you skim. Deep fills may shrink and need a second touch-up.
Step 5: Skim coat the entire wall
Don't spot-patch the torn areas and call it done. Patched spots dry and absorb paint differently from the rest of the wall, and they'll show through the paint as dull or shiny patches. A full skim coat gives you one uniform surface.
- Mix your mud. All-purpose or lightweight compound, thinned with a little water until it's smooth and spreadable. See our best joint compound for skim coating guide if you're choosing a product.
- Apply thin. Load the wall with a knife, hawk or roller, then pull it flat with a wide blade. A 24" skimming blade handles most bedroom and bathroom walls, and a 32" blade is faster on full-height open walls.
- Keep the first coat thin. Thick coats hold more water against the sealed paper and take longer to dry. Two thin coats beat one heavy coat every time.
- Let it dry completely, typically overnight, then knock down any ridges with a knife or a light sanding.
- Apply the second coat in the opposite direction to the first, thinner again.
If you've never used a wide skimming blade, our beginner-to-pro skimming blade guide covers blade angle, pressure and loading. The process is close to skim coating over painted walls, except for the adhesive cleanup and sealing steps covered above.
Step 6: Sand lightly and inspect
Sand the dried final coat with 180 to 220 grit, using light pressure. You're smoothing, not removing material. Be especially gentle near any areas that were torn. If you sand through the skim coat into sealed paper, you'll need to reseal that spot.
Hold a bright light close to the wall and aim it along the surface. Mark any ridges or low spots, spot-fill, and touch-sand once they're dry.
Step 7: Prime, then paint
Fresh joint compound needs a primer before paint. Without it, the paint absorbs unevenly and the finished wall looks blotchy, a problem called flashing. Wipe off all sanding dust, then prime the whole wall. Our best primer for skim-coated walls guide breaks down the options.
When to skim vs. replace the drywall
Skim coating handles the vast majority of post-wallpaper damage. But if large areas of gypsum are crumbling, soft, or water-damaged from over-steaming, sealing and skimming won't make them sound. Cut out and replace those sections of drywall, tape and finish the seams, and then skim the whole wall so it's uniform.
FAQ
Can I skim coat directly over torn drywall paper?
No. Water-based joint compound soaks into torn brown paper and makes it bubble. Cut away any loose paper, then seal the torn areas with a penetrating sealer or an oil- or shellac-based primer before skimming.
Do I have to remove all the wallpaper glue before skim coating?
Yes. Leftover paste re-wets under water-based mud and paint and can cause cracking, wrinkling or peeling. Wash the wall with warm water and mild detergent, rinse, and check by feel. If it's slick or tacky when damp, wash again.
Is Gardz necessary after removing wallpaper?
Not specifically Gardz, but you need some kind of sealer over any torn paper or leftover adhesive. Gardz is one product made for this job. An oil-based or shellac-based primer is the other common choice.
Why is my skim coat bubbling after wallpaper removal?
Almost always because water from the compound reached unsealed torn paper. Let it dry, cut out the bubbles with a sharp knife, seal those areas, then fill and skim again.
How many skim coats do I need after removing wallpaper?
Usually two thin coats over the whole wall, with any deep gouges filled beforehand. Walls with heavy damage may need a third coat in spots.
Can I just paint over the wall after removing wallpaper?
Only if the drywall paper is undamaged and all the adhesive is gone. Even then, prime first. If the face paper is torn or the wall is scarred, paint will show every flaw. Seal and skim first.
From torn paper to paint-ready walls
PLONIC 6-Piece Skimming Blade Kit
Six 0.5 mm stainless blades (6"–40") · telescopic pole · hard case · 6 spare inserts
★ 4.9 (36 reviews)
$129.99 · Free US shipping · 2-year warranty · 30-day returns
Shop the 6-Piece Kit →New here? Use code PLONIC10 for $10 off your first order. Just need one blade? See all sizes →